|
|
|
|||
|
Home | Troubleshooting | Quick Setup | Cisco How to | Data Recovery | Forums | Blog | IT Exam Practice | Services | About Us | Chicagotech MVP | Search | Contact Us | |
|
Altaro Hyper-V Backup
V4 Configuration
After completing the
Altaro Hyper-V Backup installation, Altaro Backup Management Console will
launch into the configuration mode.
In the configuration mode, you can 1) Select which Hyper-V Guest VMs
you would like to backup; 2) Setup Compression and Encryption; 3) Select a
local or network drive for Backup Location; 4) Setup Officesite Copy
Locations; 5) Setup Auto Backup Schedule; 6) Configure Backup Retention
Policy; 7) Configure backup and restore notifications.
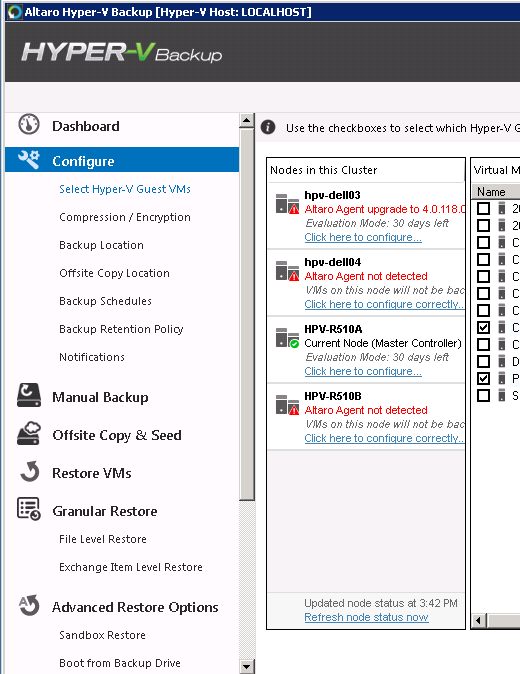
Select which Hyper-V Guest VMs you would like to backup In the Configure, click Select Hyper-V Guest VMs. In the right pane, check the VM you want to backup and the click Save Changes.
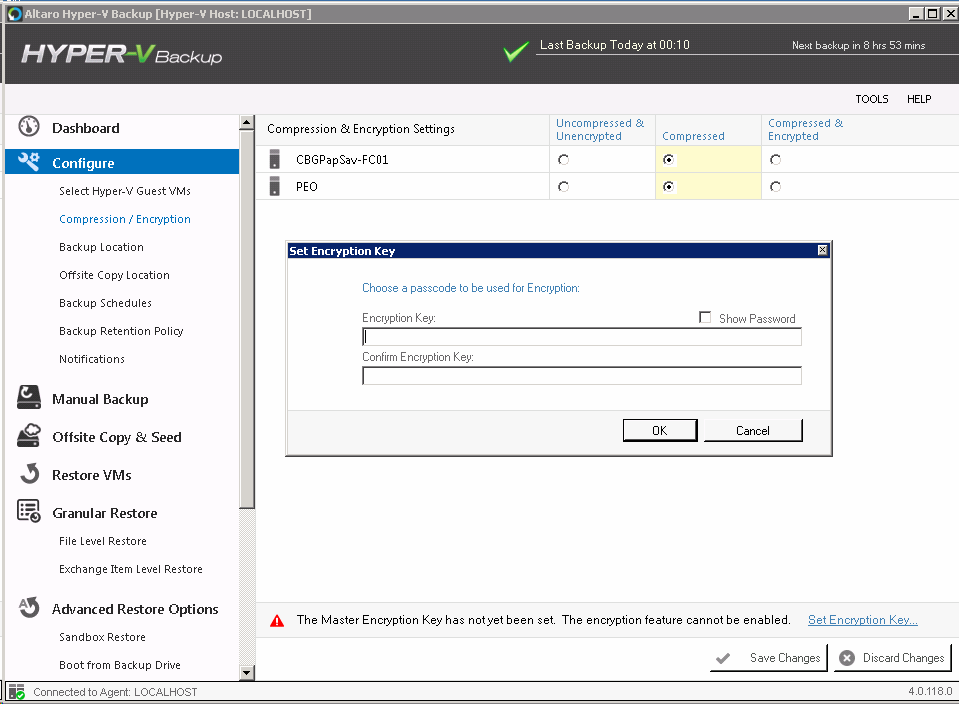
Setup Compression and Encryption Click Compression/Encryption. Check the settings. Click Set Encryption Key to choose a passcode to be used for Encryption. Click Save Charges to save the settings.
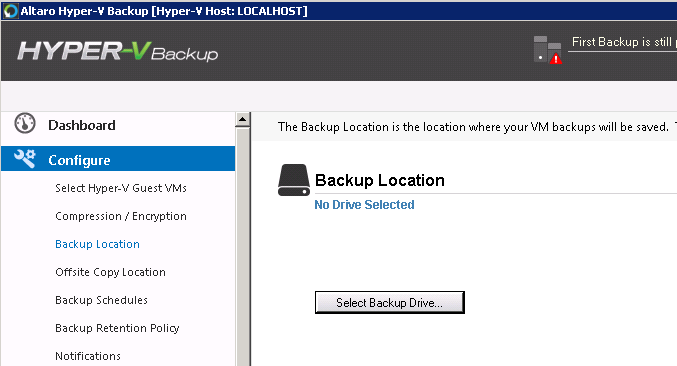
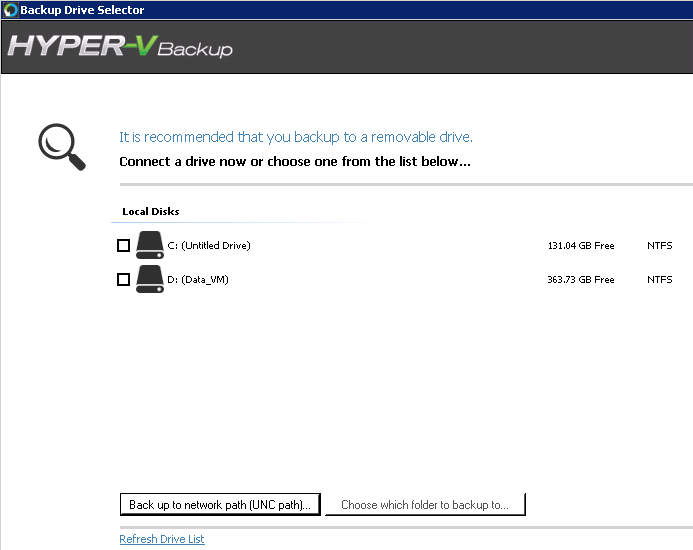
Select a local or network drive for Backup Location In Backup Location, click Select Backup Drive if this is the first time to select backup drive.
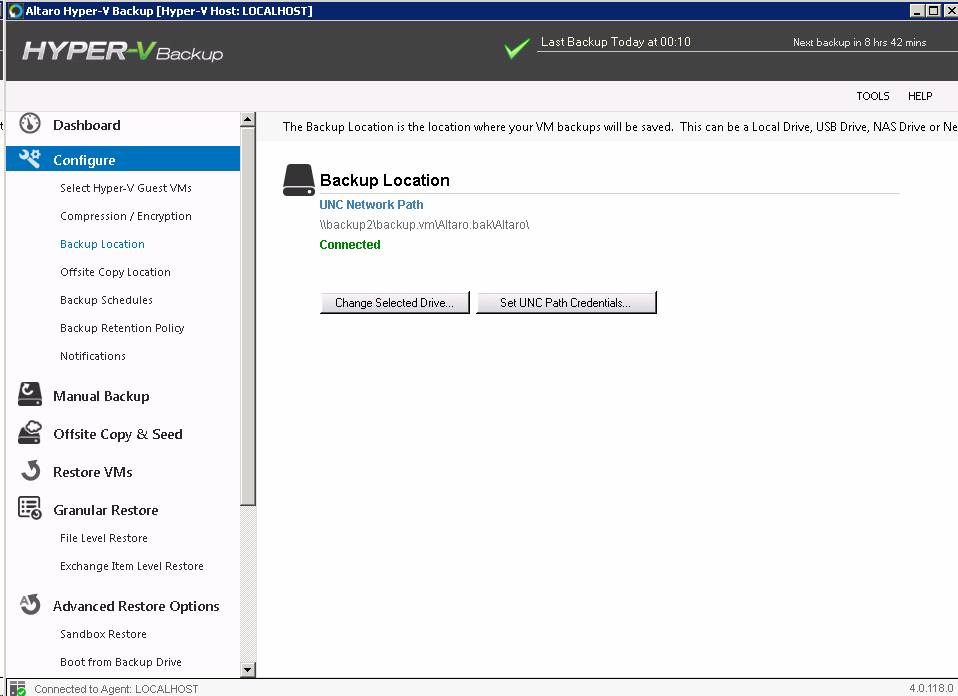
Otherwise, click Change Select Drive.
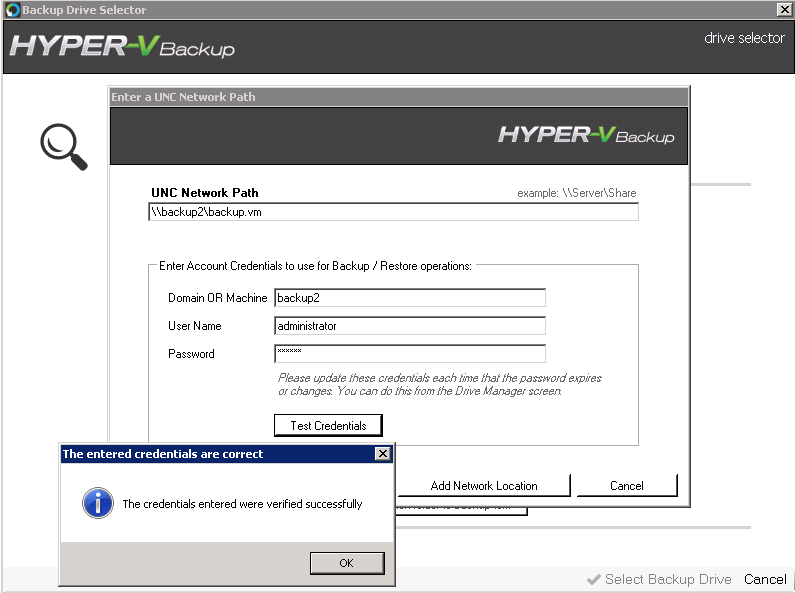
If you want to back up to network path, click Back up to network path (UNC path).
You may need to enter your credentials to access the network drive. Click Test Credentials to verify the connection.
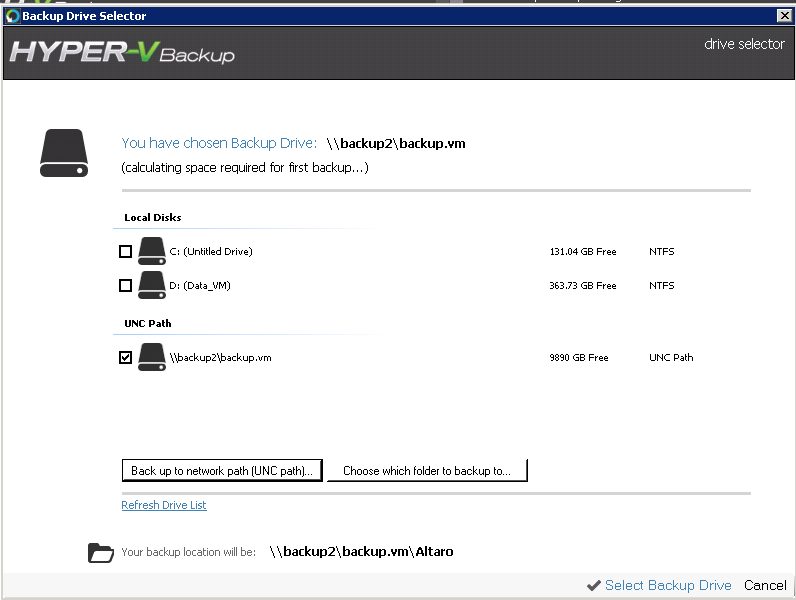
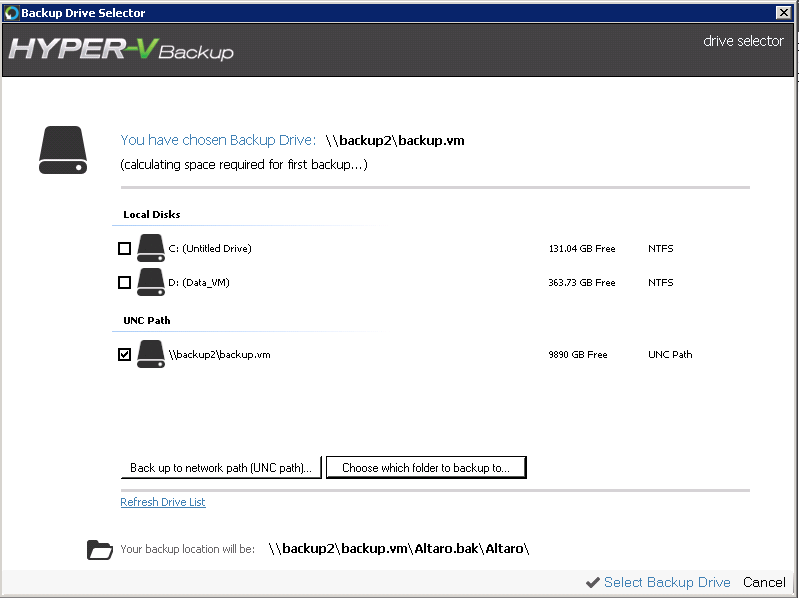
Click Add Network Location, the UNS drive display.
You may also want to choose the backup folder.
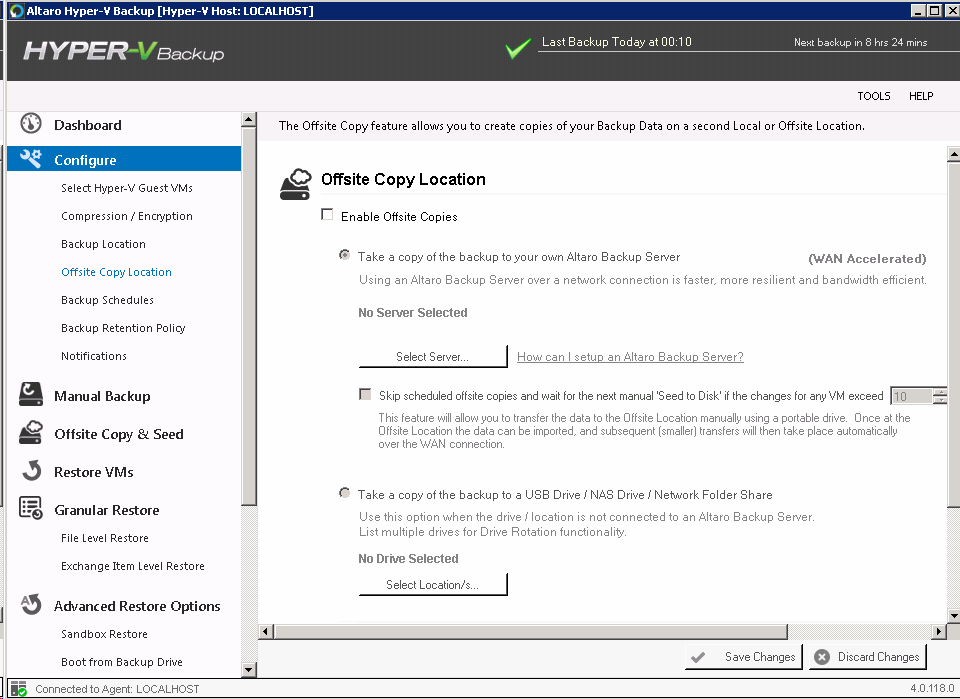
Setup Officesite Copy Locations If you enable Offsite Copy Location, you have two options: Take a copy of the backup to your own Altaro Backup Server and Take a copy of the backup to a USB Drive or NAS Drive or Network Folder Share.
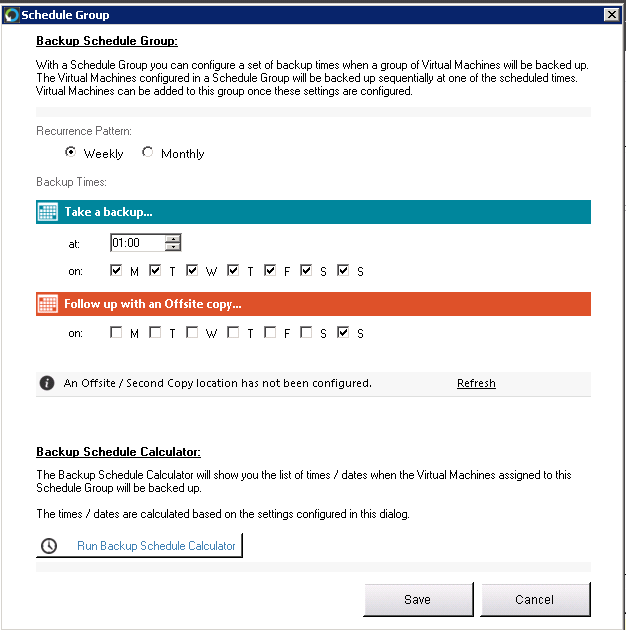
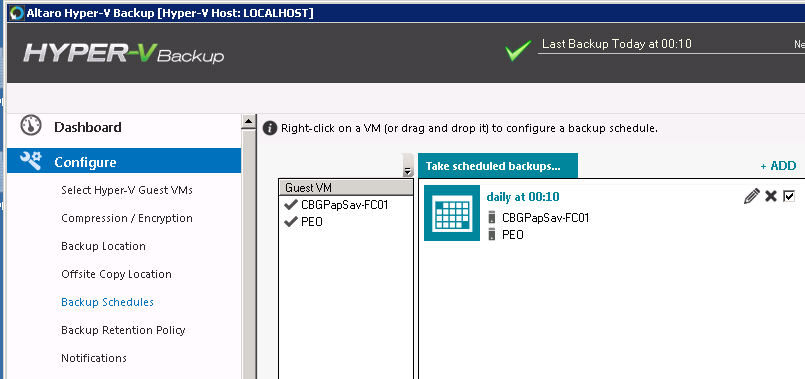
Setup Auto Backup Schedule In the Schedule Group, the Recurrence Patten are Weekly and Monthly. You can select backup day and time. You also have an option to schedule Follow up with an offsite copy.
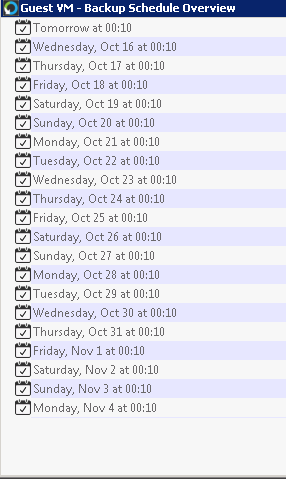
To check the scheduled jobs, click Run Backup Schedule Calculator.
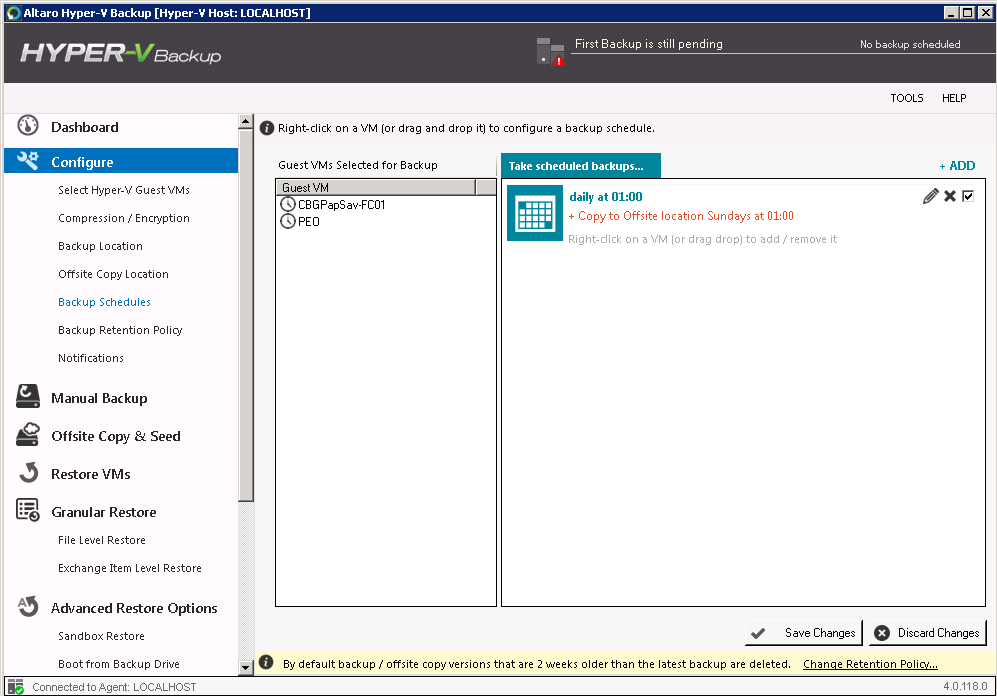
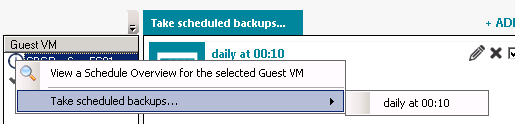
After saving the backup schedule, you need to add the VMs to it.
Right click on the VM you want to add to he schedule and selelct Take scheduled backups>daily at time.
Now, you should have VMs on the Take schedule backups pane.
Configure Backup Retention Policy Drag and drop VMs from Guest VM pane to the left pane and configure the Backup Retention plan.
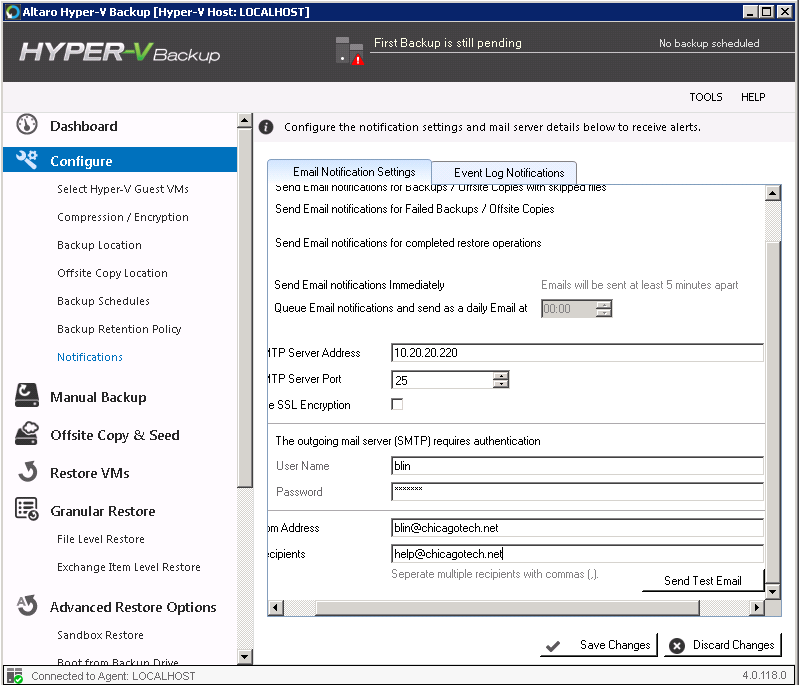
Configure backup and restore notifications To configure sending a notification, setup SMTP Server Address, SMTP Server Port, Sender and Recipient information.
Click Save Charge to complete the configuration.
Post your questions, comments, feedbacks and suggestions Related Topics
|
|
|
This web is provided "AS IS" with no warranties.
Copyright © 2002-2018
ChicagoTech.net,
All rights reserved. Unauthorized reproduction forbidden.