|
|
|
|||
|
Home | Troubleshooting | Quick Setup | Cisco How to | Data Recovery | Forums | Blog | IT Exam Practice | Services | About Us | Chicagotech MVP | Search | Contact Us | Chicago Area Laptop for rent: $35 per day plus $10 for additional day |
|
How to configure Roaming Profile - Step by step with screenshots
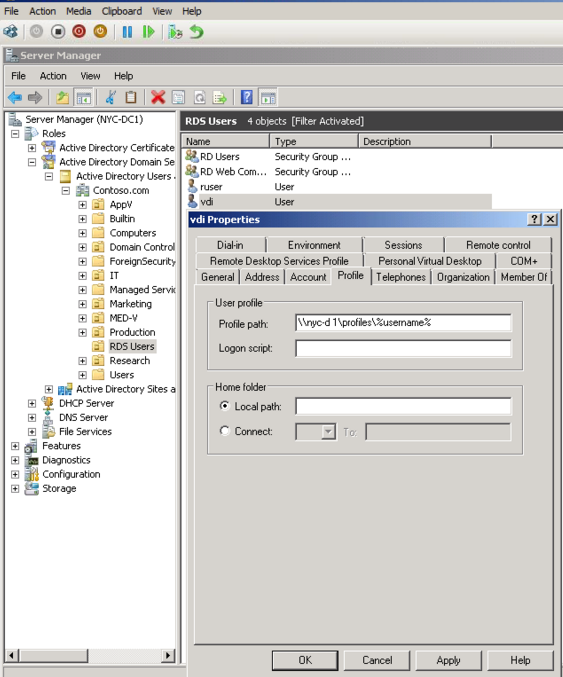
1. Create a shared folder for roaming profile, for example profile. 2. Open Active Directory Users and Computers. 3. Right click on the user or group you wan to create the roaming profile and select Properties. 4. Click Profile and enter \\servername\profile\%username% in Profile path. 5. Click O to save the settings.
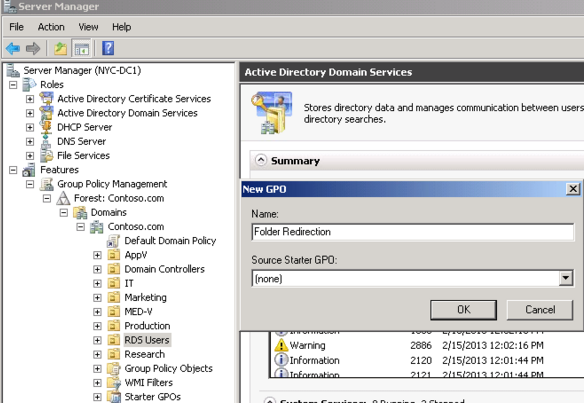
6. Open Group Policy Management. 7. Right click on domain name and click Create a GPO in this domain, and Link it here. 8. In the New GPO, enter name, for example Folder Redirection.
4. Right click on the new group policy you just created, Folder Redirection and select Edit. 5. Navigate to User Configuration>Policies>windows Settings>Folder Redirection. 6. Right click on the Folder, for example Desktop and select Properties. 7. In the Properties, setup target folder, root path. 8. Save the settings.
9. Run gpupdate /force and test it.
Post your questions, comments, feedbacks and suggestions Related Topics
|
|
|
This web is provided "AS IS" with no warranties.
Copyright © 2002-2018
ChicagoTech.net,
All rights reserved. Unauthorized reproduction forbidden.